Perkembangan teknologi kearah IoT (Internet of Things) , telah mendorong para embedded system memerlukan jenis komputasional yang lebih cepat canggih dan dilengkapi dengan banyak peripheral. Terkadang bila kita hanya menggunaka single microcontroller saja beberapa problem tidak bisa terpecahkan. Sebagai contoh bila kita ingin melakukan pengolahan image, maka kita memerlukan pemrosesan yang cepat dan mendukung. Oleh karena itu solusinya adalah menggunakan single board computer sebagai master dan microcontroller sebagai slave. Ada banyak jenis single board computer yang berkembang zaman ini. Sebut saja, Raspberry Pi, Banana Pi, Beagleboard, Cubieboard, Udoo, Odroid dan pcDuino. Nah pada postingan kali ini ingin berbagi dengan teman2 hasil reviewnya dilihat dari peripheral yang ditawarkan.
Raspberry Pi
Saat tulisan ini di posting. Rassbery Pi yang rilis ialah tipe B+ dan tipe A+. Berikut potongan fitur dan perbedaanya antara B+ dengan A+.

Tipe B+
The Model B+ is the higher-spec variant of the Raspberry Pi. It replaced the original Model B in July 2014. Compared to the Model B it has:
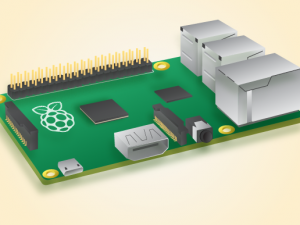
- More GPIO. The GPIO header has grown to 40 pins, while retaining the same pinout for the first 26 pins as the Model B.
- More USB. We now have 4 USB 2.0 ports, compared to 2 on the Model B, and better hotplug and overcurrent behaviour.
- Micro SD. The old friction-fit SD card socket has been replaced with a much nicer push-push micro SD version.
- Lower power consumption. By replacing linear regulators with switching ones we’ve reduced power consumption by between 0.5W and 1W.
- Better audio. The audio circuit incorporates a dedicated low-noise power supply.
- Neater form factor. We’ve aligned the USB connectors with the board edge, moved composite video onto the 3.5mm jack, and added four squarely-placed mounting holes.
Tipe A+
The Model A+ is the low-cost variant of the Raspberry Pi. It replaced the original Model A in November 2014. Compared to the Model A it has:
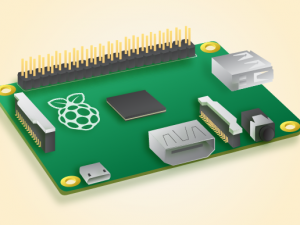
- More GPIO. The GPIO header has grown to 40 pins, while retaining the same pinout for the first 26 pins as the Model B.
- Micro SD. The old friction-fit SD card socket has been replaced with a much nicer push-push micro SD version.
- Lower power consumption. By replacing linear regulators with switching ones we’ve further reduced power consumption.
- Better audio. The audio circuit incorporates a dedicated low-noise power supply.
- Smaller, neater form factor. We’ve aligned the USB connector with the board edge, moved composite video onto the 3.5mm jack, and added four squarely-placed mounting holes. Model A+ is approximately 2cm shorter than the Model A.
Fitur Rasbeery Pi
| Developer |
Raspberry Pi Foundation |
| Type |
Single-board computer |
| Release date |
February 2012 |
| Introductory price |
US$20 (model A+), US$25 (model A) and US$35 (model B, B+) |
| Operating system |
Linux (Raspbian, Debian GNU/Linux,OpenELEC, Fedora, Arch Linux ARM,Gentoo), RISC OS, FreeBSD, NetBSD,Plan 9, Inferno, OpenWrt |
| Power |
2.5 W (model A), 3.5 W (model B)1.0 W (model A+) 3.0 W (model B+) |
| CPU |
ARM1176JZF-S (ARMv6k) 700 MHz |
| Memory |
256 MB (Model A and A+)
256 MB (Model B rev 1)
512 MB (Model B rev 2, B+) |
| Storage |
SD card slot
SD or SDHC card (Model A and B), MicroSD card (Model A+ and B+), 4 GB eMMC (Compute Module) |
| Graphics |
Broadcom VideoCore IV |
Learn Raspberry Pi:
http://www.raspberrypi.org/resources/learn/
http://www.raspberrypi.org/tag/tutorials/
https://learn.adafruit.com/category/learn-raspberry-pi
https://learn.adafruit.com/category/raspberry-pi
https://github.com/raspberrypilearning
http://makerzone.mathworks.com/resources/getting-started-with-raspberry-pi-hardware/
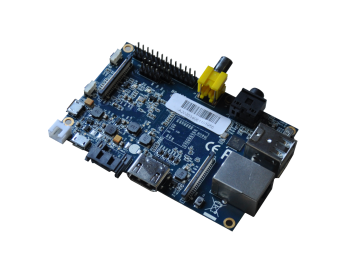
Banana Pi
Nah selain menggunakan Raspberry Pi, Banana Pi adalah salah satu SBC yang cukup handal di segi fiturnya. Ada 4 varian Banana Pi, yaitu Banana Pi-M1, Banana Pi-R1, Banana Pi-D1 dan Banana Pi-M2
Nah buat temen2 yang ingin meng oprek Banana Pi, langsung saja joint ke forumnya di http://forum-bananapi.de, nah untuk detail perbedaan Banana Pi dengan Raspberry Pi klik link berikut ini.
Beagleboard
Bila pada Rasberry Pi ada tipe A dan B, maka pada Beagleboard ada tiga-empat tipe nih, disini akan di ulas 3 tipe dari Beagleboard, pertama tipe Black, kedua Bone dan ketiga xM.

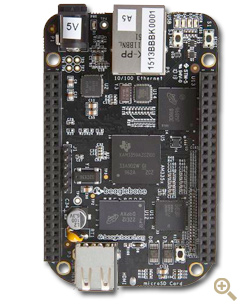
Beagleboard – Black
BeagleBone Black is a low-cost, community-supported development platform for developers and hobbyists. Boot Linux in under 10 seconds and get started on development in less than 5 minutes with just a single USB cable.
 Fitur Beagleboard – Black
- Processor: AM335x 1GHz ARM® Cortex-A8
- 512MB DDR3 RAM
- 4GB 8-bit eMMC on-board flash storage
- 3D graphics accelerator
- NEON floating-point accelerator
- 2x PRU 32-bit microcontrollers
- USB client for power & communications
- USB host
- Ethernet
- HDMI
- 2x 46 pin headers
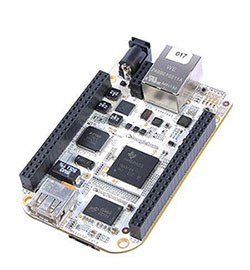
Beagleboard – Bone
BeagleBone is an $89 MSRP, credit-card-sized Linux computer that connects to the Internet and runs software such as Android 4.0 and Ubuntu. With plenty of I/O and processing power for real-time analysis provided by an AM335x 720MHz ARM® processor, BeagleBone can be complemented with cape plug-in boards to augment functionality.
Fitur Beagleboard – Bone
- Processor: AM335x 720MHz ARM Cortex-A8
- 256MB DDR2 RAM
- 3D graphics accelerator
- ARM Cortex-M3 for power management
- 2x PRU 32-bit RISC CPUs
- USB client: power, debug and device
- USB host
- Ethernet
- 2x 46 pin headers
BeagleBoard-xM
The $149 MSRP BeagleBoard-xM delivers with the help of its AM37x 1GHz ARM processor, enabling hobbyists, students and innovators to bring a project to development fast. Designed with community inputs in mind, this open hardware design brings the previous generations’ laptop-like performance and expandability to the next level, while adhering to hand-held power levels. Direct connectivity is supported by the on-board four-port hub with 10/100 Ethernet, while maintaining a tiny credit-card-sized footprint.

Fitur Beagleboard – xM
- Processor: AM37x 1GHz ARM Cortex-A8 compatible
- More than 2,000 Dhrystone MIPS
- Up to 20 million polygons/second graphics
- HD video capable C64+TMDSP core
- 512 MB LPDDR RAM
- 2D/3D graphics accelerator
- 4 USB 2.0 ports
- MMC/SD connector
- DVI-D port
- S-Video port
- USB mini AB connector
- Ethernet
Learn Beagleboard:
https://learn.adafruit.com/category/beaglebone
http://elinux.org/BeagleBoard_Education_Workshops
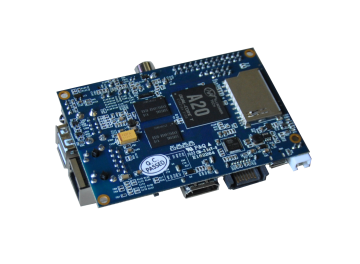
Cubieboard
Selain menggunakan Beagleboard, Cubie juga sangat menarik untuk dicoba. Cubie memiliki 4 variant type yaitu Cubieboard 1, Cubieboard 2, Cubieboard 3, Cubieboard 4.
Learn Cubieboard:
http://resprolabs.in/learn/cubieboard/
http://www.buyapi.ca/cubieboard-and-cubietruck-in-canada/
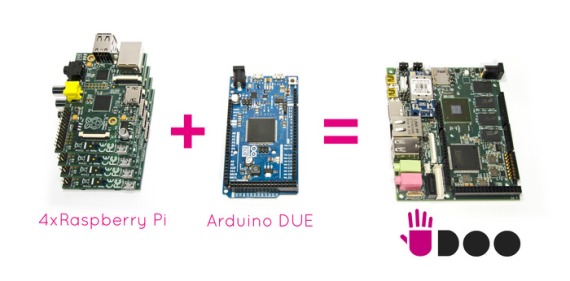
Udoo
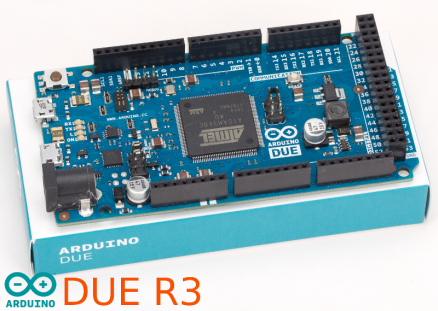
Setelah Raspberry Pi, Beaglebone… selanjutnya kita akan mereview Udoo. Yups Udoo adalah Mini-PC yang di ilustrasikan seperti 4 buath Raspberry Pi + Arduino Due. Wow bisa dibayangkan bahwa kecepatanya 4 kali Raspberry Pi sekaligus termasuk Arduino Due sebagai slave microcontrollernya. Menarik Bukan… ane suka pake Udoo hehhee 😀
Kickstarter review
Fitur Udoo
- Freescale i.MX 6 ARM Cortex-A9 CPU Dua/Quad core 1GHz
- Integrated graphics, each processor provides 3 separated accelerators for 2D, OpenGL® ES2.0 3D and OpenVG™
- Atmel SAM3X8E ARM Cortex-M3 CPU (same as Arduino Due)
- RAM DDR3 1GB
- 76 fully available GPIO
- Arduino-compatible R3 1.0 pinout
- HDMI and LVDS + Touch (I2C signals)
- Ethernet RJ45 (10/100/1000 MBit)
- WiFi Module
- Mini USB and Mini USB OTG (micro with the final release)
- USB type A (x2) and USB connector (requires a specific wire)
- Analog Audio and Mic
- SATA (Only Quad-Core version)
- Camera connection
- Micro SD (boot device)
- Power Supply 12V and External Battery connector
Learn Udoo:
http://www.udoo.org/getting-started/
http://www.udoo.org/tutorials/
http://www.elinux.org/UDOO_programming_the_embedded_Arduino_microcontroller
Odroid
Selanjutnya kita akan me-review Odroid. Kali ini tidak kalah dengan Udoo, Odroid juga menwarkan komputasi yang jauh lebih cepat dari Raspberry Pi. Bahkan Odroid versi U3 komputasinya lebih cepat ketimbang Udoo plus dengan harganya yang murah pula. Berikut ini penampakan fisik dari Odroid U3.
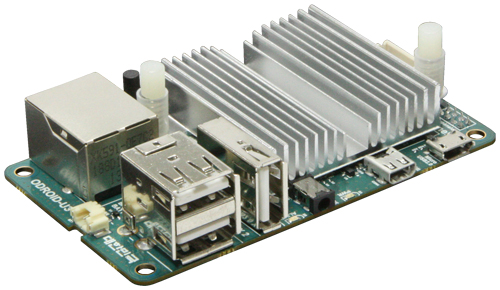
Fitur Odroid U3
- The Powerful Linux Computer
- 1.7GHz Quad-Core processor and 2GByte RAM
- 10/100Mbps Ethernet with RJ-45 LAN Jack
- 3 x High speed USB2.0 Host ports
- Audio codec with headphone jack on board
- GPIO/UART/I2C ports
- XUbuntu 13.10 or Android 4.x Operating System
- Size : 83 x 48 mm, Weight : 48g including heat sink
- Package includes the main board and the heat sink
Untuk yang lebih power-full Odroid U3 – XU3
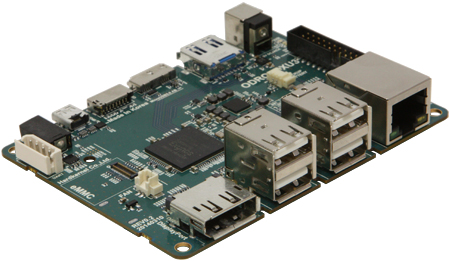
- Samsung Exynos5422 Cortex™-A15 2.0Ghz quad core and Cortex™-A7 quad core CPUs
- Mali-T628 MP6(OpenGL ES 3.0/2.0/1.1 and OpenCL 1.1 Full profile)
- 2Gbyte LPDDR3 RAM at 933MHz (14.9GB/s memory bandwidth) PoP stacked
- eMMC5.0 HS400 Flash Storage
- USB 3.0 Host x 1, USB 3.0 OTG x 1, USB 2.0 Host x 4
- HDMI 1.4a and DisplayPort1.1 for display
- Integrated power consumption monitoring tool
Learn Odroid:
http://odroid.com/dokuwiki/doku.php
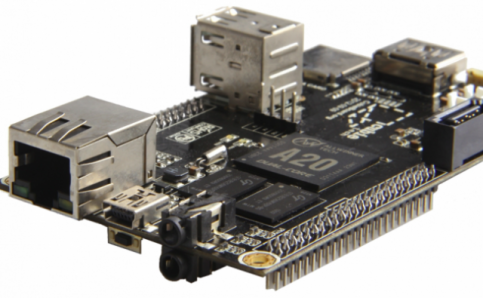
pcDuino
pcDuino merupakan mini-pc terakhir yang akan kita review, sebenarya masih banyak mini-pc lainya. Temen2 bisa melihatnya di link berikut sekaligus mengkomparasikannya. Ada 3 variant utama dari pcDuino saat tulisan ini di posting, yaitu pcDuino1, pcDuino2 dan pcDuino3 serta pcDuino Nano.
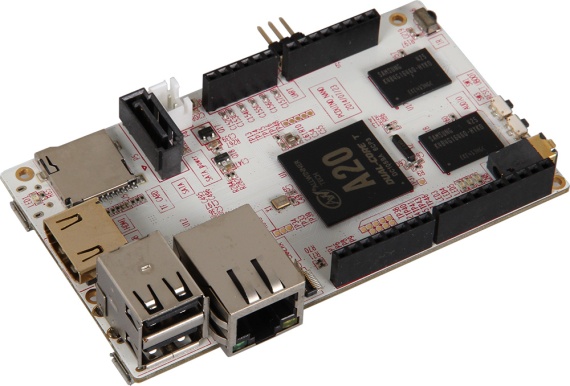
Fitur pcDuino Nano
| Items |
Details |
| CPU |
AllWinner A20 SoC, 1GHz ARM Cortex A7 Dual Core |
| GPU |
OpenGL ES2.0, OpenVG 1.1, Mali 400 Dual Core |
| DRAM |
1GB |
| Onboard Storage |
4GB Flash, microSD card (TF) slot for up to 32GB |
| Video Output |
HDMI 1.4 with HDCP support |
| OS |
|
| Arduino extension interface |
Arduino sockets, same as Arduino UNO
14xGPIO, 2xPWM, 6xADC, 1xUART, 1xSPI, 1xI2C |
| Network interface |
|
| Audio out |
- 3.5mm analog audio interface
|
|
|
| IR |
IR receiver |
| SATA |
SATA Host socket |
| Camera |
MIPI |
|
|
| USB |
2 x USB host, 1xUSB OTG |
| Power |
5V, 2000mA |
| Overall Size |
3 5/8 ” x 2 1/8″ |
Learn pcDuino:
https://learn.sparkfun.com/tutorials/programming-the-pcduino
Demikian ulasan review yang dapat saya susun. Perkembangan mini-pc sangat berkembang dengan cepat. Tentunya review pada postingan ini akan saya update. Terimakasih, semoga tulisan ini bermanfaat 😀


komentar tulisan